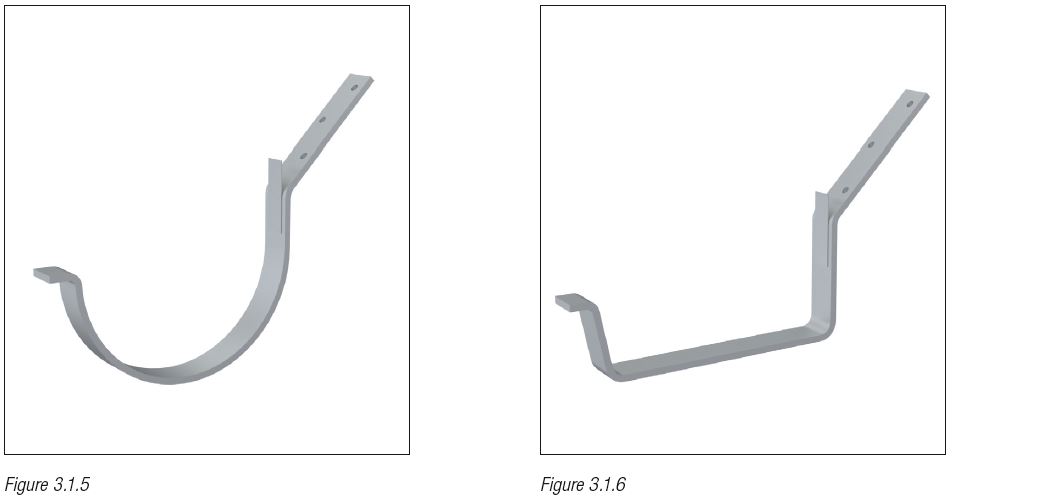
Roof gutters supported by brackets
Installation
The gutter parts should preferably be installed from left to right and against the slope (from low to high). The structural conditions do not always allow this. When choosing another installation direction, the installation from low to high is more important than from left to right (draining overlap!).
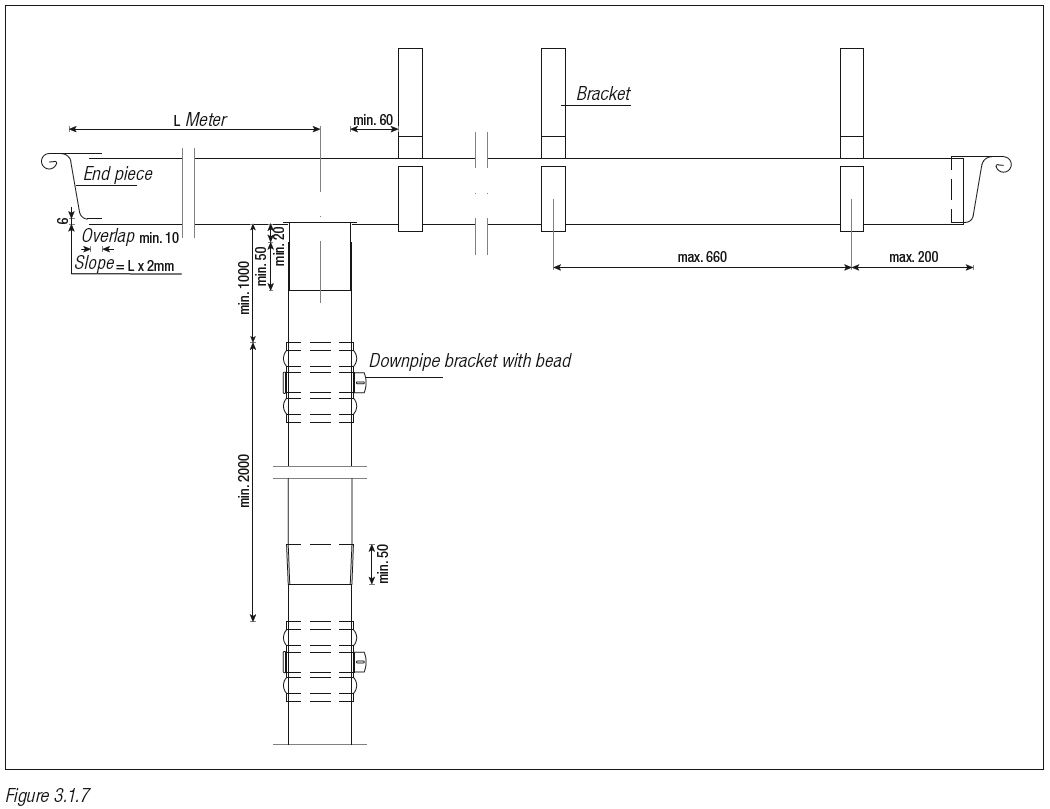
At one side of the of the gutter a locating edge or fitted edge has been applied to facilitate the joining together of the gutters. The gutter parts, starting at the bead, are joined together with a minimum overlap of 10 mm. With the same rotating movement, the gutter parts with the bead are placed in the correct position over the lip or steel angle profile of the brackets.
The clip at the back height of the bracket is now bent downwards over the water check of the back height, in such a way that the gutter can continue to move in the circumstances of contraction and expansion. The use of nails for the same purpose is not permitted as this is disastrous for the service life of the gutter! The overlap of the gutter can now be soldered. Note the minimum overlap of 10 mm and flow through of the soldering of at least 10 mm.
Gutter brackets
The hot dip galvanised gutter brackets to be used must meet the NEN-EN 1462 standard and must, according to the specifications of the manufacturer, be suitable for the type of gutter to be installed.

The form of standard and non-standard gutter brackets must be adjusted to the form of the wall plate, the required slope, the pitch of the roof and the position of the gutter to be installed (back height higher than front height).
A gutter bracket must be attached to the wall plate with at least 2 galvanised or stainless-steel screws. The distance between the gutter brackets amounts to max. 660 mm centre-to-centre. The slope in the direction of the outlet piece must amount to at least 2 mm per meter of gutter length.
